The Lab Windows VM and VirtualBox
The current Lab VM runs on Windows 7 and has an 80GB hard drive. It comes with the following software:
Pymol Marvin Pipeline Pilot Chimera GraphPad Prism Adobe Acrobat Adobe Creative Suite ChemDraw End Note Microsoft Office
How to Setup Your Windows VM:
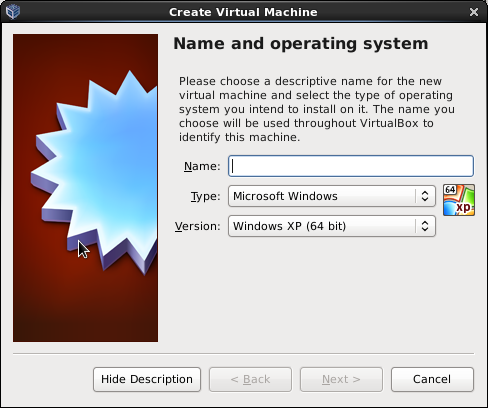
Your VM is located in your home folder in a Directory called Vms, ie, ~/Vms/LabWindows.vdi. To setup the VM open up VirtualBox and click on New. You will then see this box:
Name: you can call it whatever you want. Type: choose Microsoft Windows. Version: Windows 7 (64 bit)
Then click Next
For the Memory size, you can make it whatever you want. I usually select about 5000 MB.
Then click Next
You will see a box that looks like this:
Select "Use an existing virtual hard drive file" Then click the little folder icon to the right and navigate to and select: ~/Vms/LabWindows.vdi Then click Create. Click the Start button in the bottom left hand corner. Then click Control Panel => User Accounts and Family Safety => User Accounts => Your account => Change your password
Now to use your newly created machine, click on the Start arrow up at the top. Your default login will be your user name on the cluster and your initial password will be emailed to you. Once you've logged in please change your password. To change your password select:
If you want to attach your directories on nfs or your local directories to the VM (highly recommended):
Open VirtualBox (do not start the vm) and click on Machine => Settings => Shared Folders You will see a little folder icon with a green plus sign on the right, click on that. Then click on Folder Path and navigate to the directory you want to mount. Once you've selected the folder, click on the Auto-mount button and then click ok.
