How to use Globus: Difference between revisions
Jump to navigation
Jump to search
No edit summary |
Jgutierrez6 (talk | contribs) m (→Step 3) |
||
| (13 intermediate revisions by 3 users not shown) | |||
| Line 3: | Line 3: | ||
[https://www.globus.org/ Globus] is a non-profit service for moving, syncing, and sharing large amounts of data asynchronously in the background. Transfers are done from and to, so called, endpoints. In order to perform a file transfer from one location to another using the Globus service, both ends must have an endpoint. | [https://www.globus.org/ Globus] is a non-profit service for moving, syncing, and sharing large amounts of data asynchronously in the background. Transfers are done from and to, so called, endpoints. In order to perform a file transfer from one location to another using the Globus service, both ends must have an endpoint. | ||
== | == ZINC Globus Endpoint Name == | ||
UCSF BKS Lab Guest Collection | |||
== Step 1 == | == Step 1 == | ||
====Create an account to log in to Globus. There are a couple ways:==== | ====Create an account to log in to Globus. There are a couple ways:==== | ||
#[https://app.globus.org/ Use an Organization's login] | |||
#*If you are associated to an organization in the drop down list, you can use your organization's login to create an account. | |||
#*You can also sign up using a Google account or ORCiD ID | |||
#[https://www.globusid.org/create Create a Globus ID] | |||
== Step 2 == | == Step 2 == | ||
====To install and create a Globus Personal Endpoint:==== | ====To install and create a Globus Personal Endpoint:==== | ||
#Log in. | |||
#On the left side of the page, click the "ENDPOINTS" button on the navigation bar. | |||
#Then, on the top right, click "Create a Personal Endpoint". | |||
#Download based on your Operating System. | |||
#Execute the file and follow the on screen install instructions. | |||
#Double check that your collection is available by going to "ENDPOINTS" then to "Administered By You" which is on the top middle of the page. | |||
'''***Instructions on how to install are provided [https://www.globus.org/globus-connect-personal here] ***''' | '''***Instructions on how to install are provided [https://www.globus.org/globus-connect-personal here] ***''' | ||
| Line 31: | Line 30: | ||
Once you have your endpoint, go back to the file manager tab on the navigation bar to begin file transfer. | Once you have your endpoint, go back to the file manager tab on the navigation bar to begin file transfer. | ||
[[File:Globus1.png| | [[File:Globus1.png|1000px]] | ||
#Click on the collection input box on the left panel and then click the "Your Collections" tab. | |||
#Choose the collection that you made. | |||
#Now you should see something like this: | |||
[[File:globus_personal.png|800px]] | |||
#Next, on the right panel, click on the collection input box and type in '''UCSF BKS Lab Guest Collection''' | |||
#Click on the '''UCSF BKS Lab Guest Collection''' collection. | |||
#Now both panels are ready to transfer files to and from. | |||
#Choose a file or folder and click the blue start button at the bottom. | |||
[[File:globus_share.png|1000px]] | |||
Latest revision as of 00:34, 16 December 2022
Introduction
Globus is a non-profit service for moving, syncing, and sharing large amounts of data asynchronously in the background. Transfers are done from and to, so called, endpoints. In order to perform a file transfer from one location to another using the Globus service, both ends must have an endpoint.
ZINC Globus Endpoint Name
UCSF BKS Lab Guest Collection
Step 1
Create an account to log in to Globus. There are a couple ways:
- Use an Organization's login
- If you are associated to an organization in the drop down list, you can use your organization's login to create an account.
- You can also sign up using a Google account or ORCiD ID
- Create a Globus ID
Step 2
To install and create a Globus Personal Endpoint:
- Log in.
- On the left side of the page, click the "ENDPOINTS" button on the navigation bar.
- Then, on the top right, click "Create a Personal Endpoint".
- Download based on your Operating System.
- Execute the file and follow the on screen install instructions.
- Double check that your collection is available by going to "ENDPOINTS" then to "Administered By You" which is on the top middle of the page.
***Instructions on how to install are provided here ***
Step 3
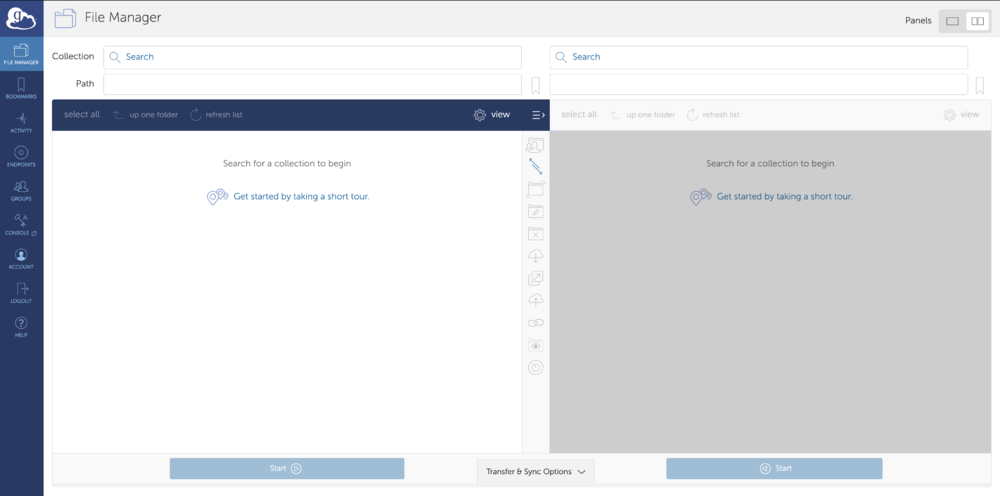
Once you have your endpoint, go back to the file manager tab on the navigation bar to begin file transfer.
- Click on the collection input box on the left panel and then click the "Your Collections" tab.
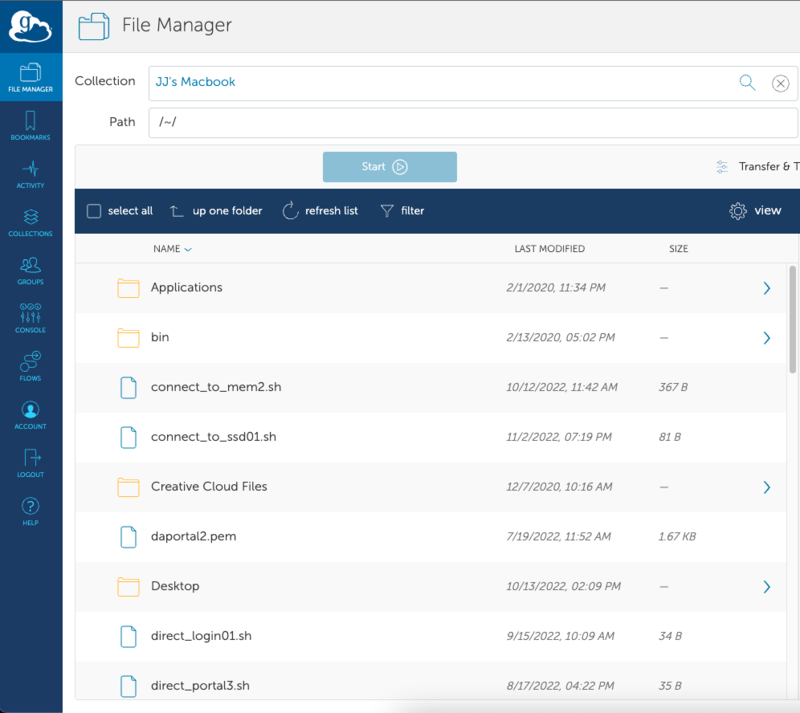
- Choose the collection that you made.
- Now you should see something like this:
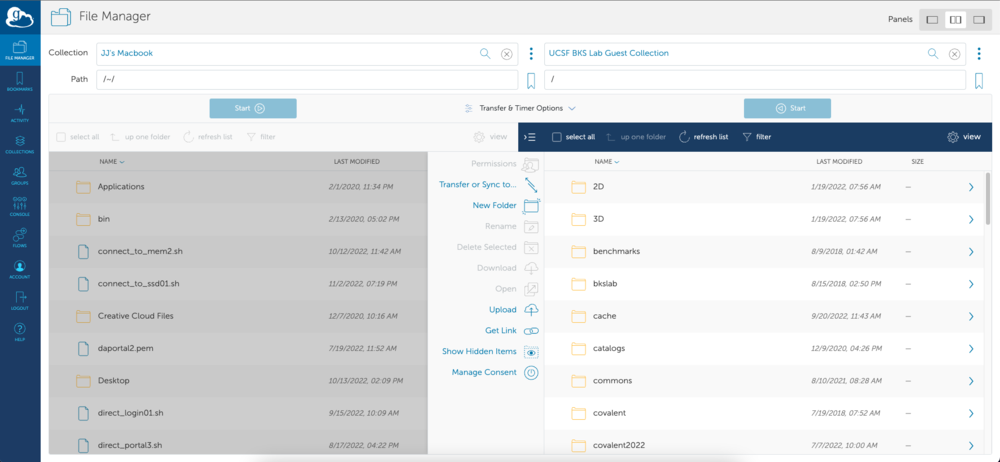
- Next, on the right panel, click on the collection input box and type in UCSF BKS Lab Guest Collection
- Click on the UCSF BKS Lab Guest Collection collection.
- Now both panels are ready to transfer files to and from.
- Choose a file or folder and click the blue start button at the bottom.


